After cutting the glass, I use a grinder to smooth the edges. You might notice some red in the plastic grill as well as a dot or so on the face shield.

Sometimes grinding is hazardous. A piece slipped and sliced my finger. Yikes!


After a short interruption and a band aid, I cleaned the glass with isopropyl alcohol, added a drop of clear glue, stacked the pieces together, and placed in the kiln.


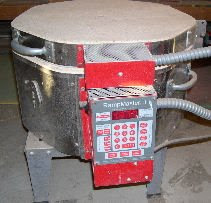
I use five segments in the kiln program to ramp up to 1415 degrees, hold, and cool to 100 degrees. On small fusing projects such as this one, it takes about 13 hours before safely removing the pendants from the kiln. The photo on the right shows the pendants in the process of cooling from the 1415 degree fusing temperature. By lifting the top, I flash cool the kiln to 1100 degrees from 1415 degrees. I, then, close the kiln top for the pendants to slowly cool to 100 degrees after a 30 minute hold at 960 degrees. The slow annealing process prevents the glass from cracking several months or even years later.
 A closeup of the fused pendants are in the photo on the left. The next step is to cap each pendant with clear glass, and return to the kiln for a second firing. After this firing, I'll sign the pendant back, make and polish silver bails, and attach by placing a couple drops of an epoxy glue to the back of the pendant.
Until next time, God bless.

2 comments:
Very pretty Lynne! Fascinated by how the glass pieces come together!
Mary-Austin
Thanks, Mary-Austin, I'm equally fascinated the way the glass fuses. Usually, I'm on pins and needles waiting until the temperature is at a 100 degrees. :D
Post a Comment